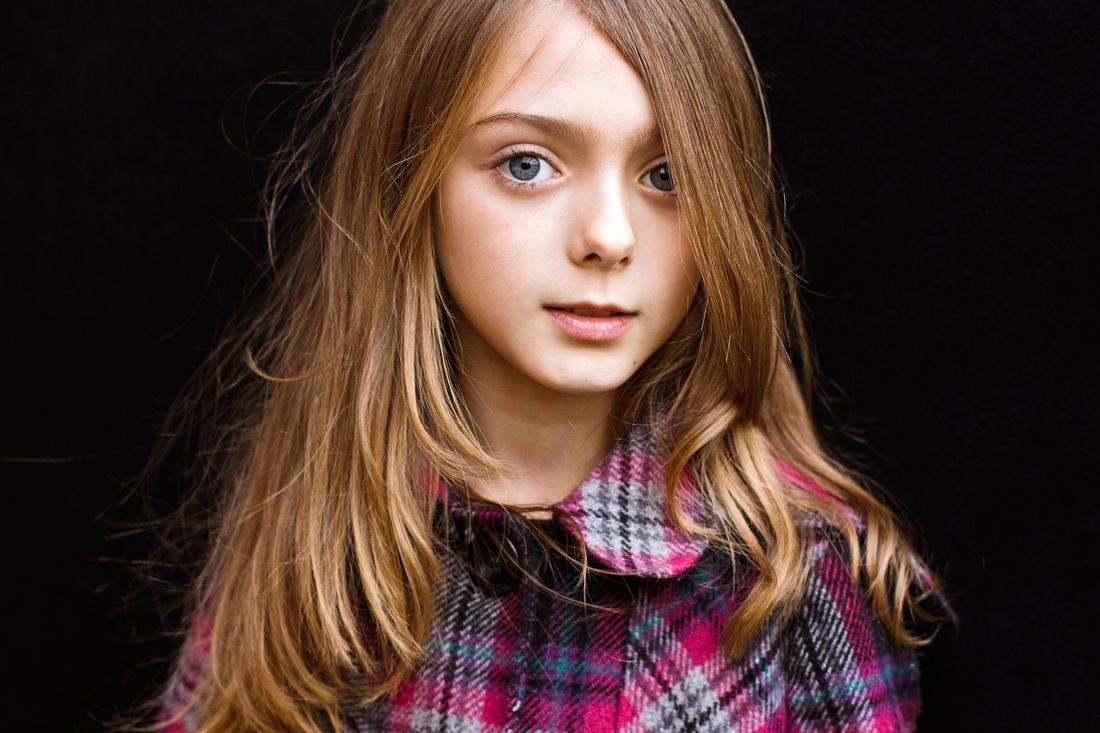
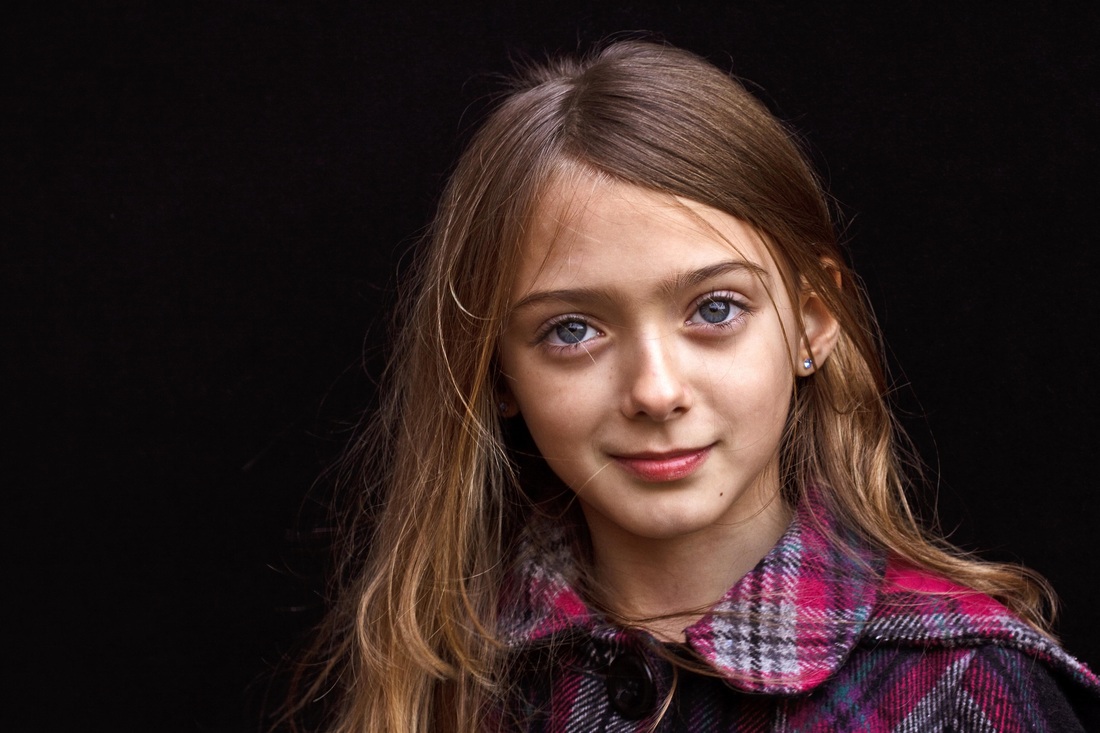
 This project consists of a structured approach to choose just 2 final images out of a set of at least 50 that deal with the same subject matter. For the purpose of the project I need to imagine that these 2 images might be used for a publication. I want what I learn from this project to form the basis of how I am going to manage my editing in the future, I want an easy and efficient method that I will continue to use . I use Lightroom to catalogue my images so it makes sense to use the library module to categorise and filter each shoot. I started with 56 portrait (head/shoulders) images, all very similar in composition, taken in sequence during a single session. All were taken outdoors using available daylight using a 50mm prime lens , cable release, tripod , and a black backdrop. My model , Maisie, is my granddaughter who is 8. I often find my best images are towards the end of a session as my model (whoever that may be) relaxes more and takes less notice of the camera. I also check the histogram as I go along so often get better technical results as I can correct any glaringly obvious exposure problems early in the shoot. I will be interested to discover at what point during this session my final chosen 2 favourites were taken.
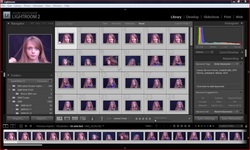
Step 1 The technical edit 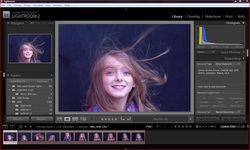 Rejecting images at this stage is not for any artistic or aesthetic reason. Looking at the images in the LR browser any displaying camera shake, badly exposed, or not in sharp focus were flagged red "to delete" . Also included in this initial selection were any that were obviously unsuitable , for example in one frame Maisie's eyes were shut .A total of 10 were initially flagged red and deleted. This is perhaps the easiest editing decision to make-- the choices made later are more subjective.
Step 2 The selects 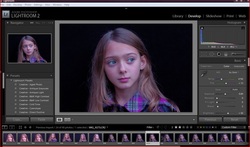 At this stage I was careful to examine Maisie's varied facial expressions and stance . Choosing between some of the very similar images took more time than the initial technical edit and I included a few that I could not make an immediate decision about. Out of the 46 left I whittled these down to 24 which were then given a "star rating" of 2 making it easy to review them together again as a single group. I excluded any images that did not capture exactly what I was aiming for. Even though I used my cable release and was able to observe Maisie's facial expression carefully when shooting there were a couple of unflattering poses.
Step 3 The first selects 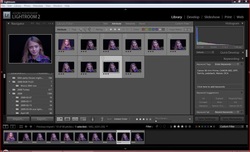 With just 24 images left it I thought it would became a more difficult task. Interestingly I found by filtering the images into different categories and then being able to then view them as a group independently made the task easier . I have never reviewed, and flagged my shoots into groups like this before, so using a system like this in future will definitely help improve my own personal workflow. Some were so similar I needed to scrutinise them carefully to pick out just the slightest difference and choose, what I felt, was the better image. Pose, facial expression, and because I was using a child, how appropriate the image (see reading section re Vogue images) were all equally important. I rejected some very tightly composed headshots preferring the head and shoulder images shot later in the session. I like very close up portraiture but these seemed unbalanced, too posed, and unflattering . They were also the initial shots of the session, I feel the later images, composed slightly differently, improved the final outcome. I then gave each a "star rating" of 3,choosing 10 first selects from which to make my final choice of 2. Eye contact is important in portraiture but I sometimes find the most telling images are those without this direct gaze, for this reason I have also included 3 frames in which Maisie looks away from the camera.
Step 4: Group and review
After a break--shopping & visiting I reviewed my choices again. I was generally happy with my first and second select choices, but felt one of my initial first selects was actually not as good as the remainder so reduced its star rating, leaving just 9 starred favourites . Maisie's lips looked rather too pursed , something I had not really noticed, this spoiled the overall image, so having a break and reviewing the images again was worthwhile .
Step 5: A final choice
Out of the nine remaining 3 starred images a choice needed to be made for my final two and I think they are technically the best from the series of shots taken. These were awarded 5 stars. (I shall keep my 4 star rating for those images that I feel may be used but need more PP work) Having started with over 50 images I thought it would be difficult to choose just 2 favourites. What I found however was by breaking the workflow into workable sections and making a decision at each stage helped simplify and focus my mind more clearly. Interestingly , having made my final decision, I found post-processing could be kept to the bare minimum. Having chosen the best , technically and aesthetically, reduced the amount of time spent working in LR & PS.
Conclusion & thoughts about project.
I think the valuable lesson I have learned is just how important it is to spend time weeding out bad, and just average, images and concentrating only on what I consider my personal best. The time is well spent at this stage and helps create an efficient and proffessional workflow. This does have drawbacks, like most other novice (and probably professional) photographers my harshest critic is myself. But by raising the standard I need to reach and critically reviewing my own images I can hopefully improve, gain confidence, and perhaps even create a masterpiece !!! Both my final chosen images were taken towards the end of my session, and I feel are not only technically the best but are aesthetically pleasing too. Using my own family as models does have drawbacks, I am involved with them and need to be careful not to allow this to influence how I choose to portray them and be seen by the world.
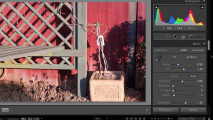
Three bracketed exposures of low, average and high contrast scenes are needed for this exercise. I do routinely check the histogram on my camera LCD screen and when reviewing the images in LR. Additionally the highlight and shadow clipping warnings are always left on. However a histogram is just a guide , low or high key scenes will have very different histograms but this does not make them bad images. I am not a very technical person so describing how I see and interpret histograms is actually rather difficult for me to write about so please excuse any rather un-technical terminology I may use in my efforts!
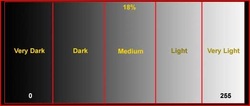
A histogram grap below showing tonal range from very dark on the left to very light on the right.
| Low contrast.
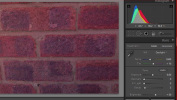
I shall call these my boring collection- a brick wall taken early morning !!! My camera indicated that all three images had little tonal contrast with the values close to each other spread over only a small proportion of the histogram graph.They each have a pyramid shape. None showed clipping but the values move towards the right hand side as the exposure is increased. All images F4.5 @ 14mm ISO 200.
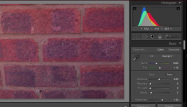
|  Darker exposure.
The tonal range is restricted to dark and medium tones. here to edit.
@ 40 secs
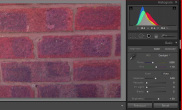
|  Average exposure.
The values have shifted slightly right towards the mid range tones.
@ 30 secs
|  Brighter exposure.
The values have once again moved right towards the lighter mid range tones.
@ 25 secs
| | High contrast.
All images taken @ 50mm ISO 200 1/500.
The camera and on screen histogram indicated that all 3 images were clipped in the highlight and shadow areas.
Unlike the low contrast graphs these are spread all across the tonal range with high and low peaks indicating a wide range of very dark to very light tones that will create a high contrast image.
| 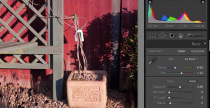 The graph indicates a darker toned image than the other 2 exposures.
It shows much lower peaks in the mid and light toned areas but a very high peak in the darkest area of the graph.
F6.3
|  The graph has shifted towards the right with very high peaks in both the dark and light areas
F5.6
| 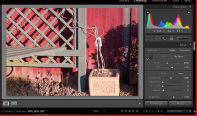 The graph's peaks are less prounounced moving towards the right. I actually expected this histogram to move further towards the right than it did using the larger aperture. However it does indicate there are now less dark and medium tones than before.
F5
| | Medium contrast.
Looking at the medium contrast graphs I can see that although the tonal range is quite broad it creates a smoother gradual curved graph than that of the dramatic high and low peaks created by the high contrast images.
All images taken @ 50mm ISO 200 F 5
| 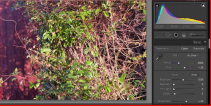 The tonal values are spread across the graph but indicating a greater amount of dark tones due to the shorter exposure.
1/320
| 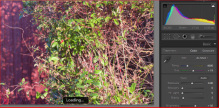 This graph indicate less dark and more mid tones with some highlight clipping. here to edit.
1/250
|  The slower exposure time has increased the overall brightness and amount of clipped highlights.
1/200
|
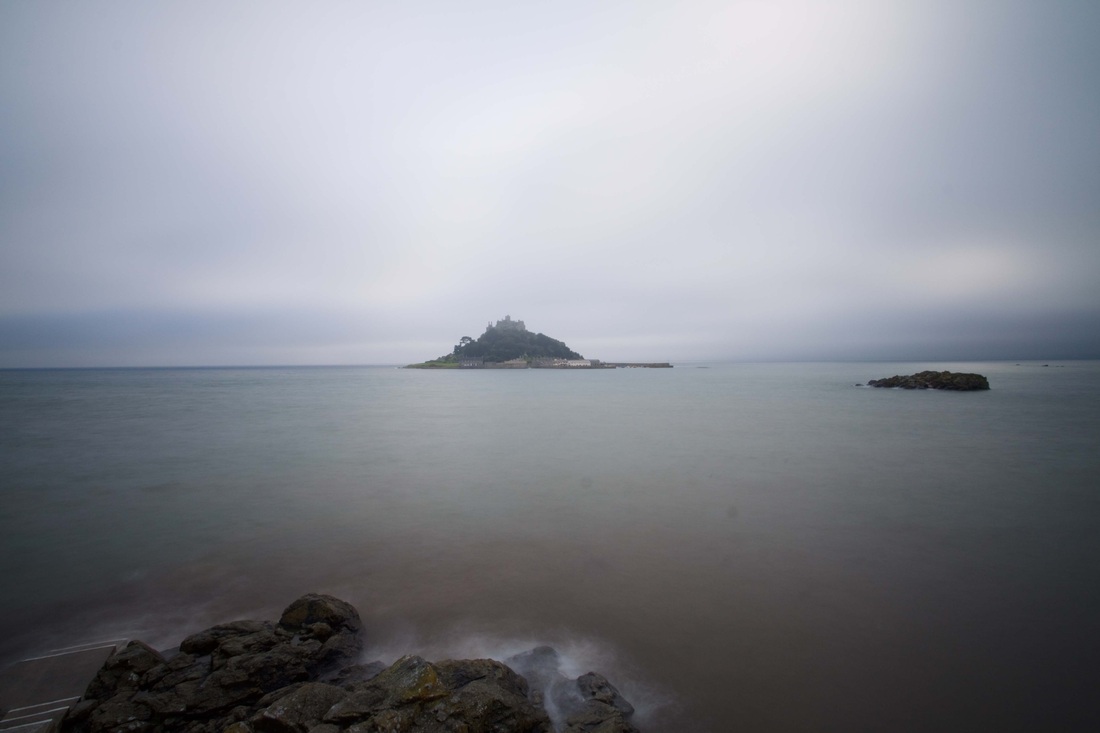
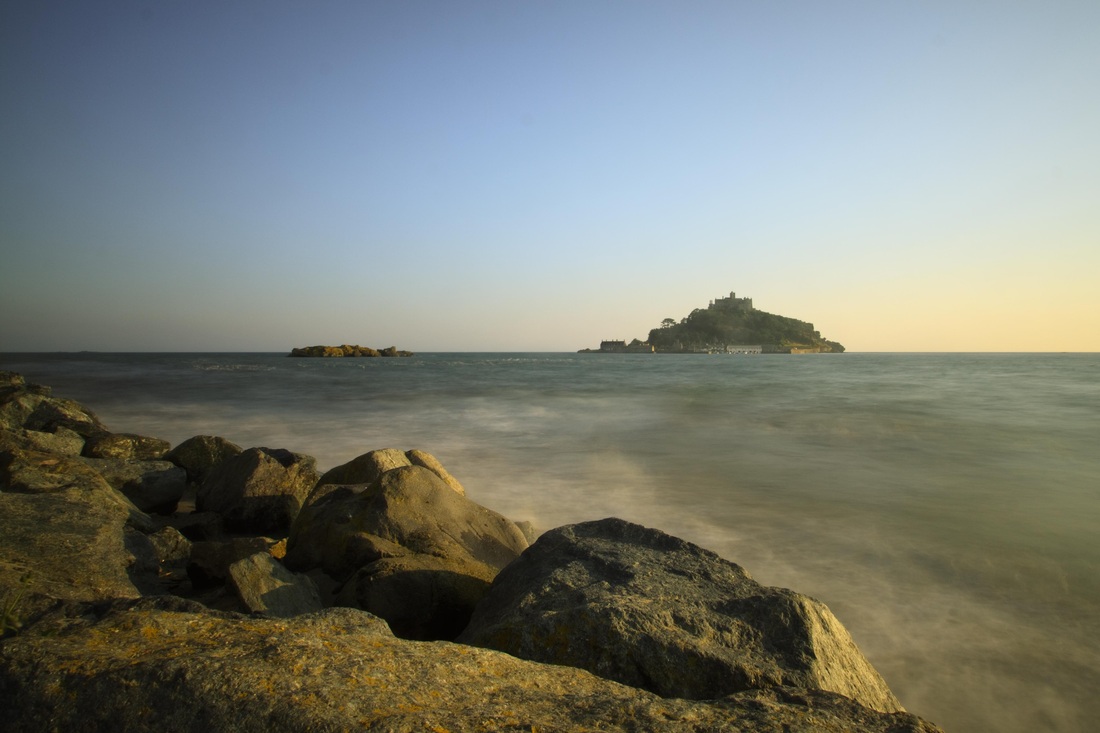
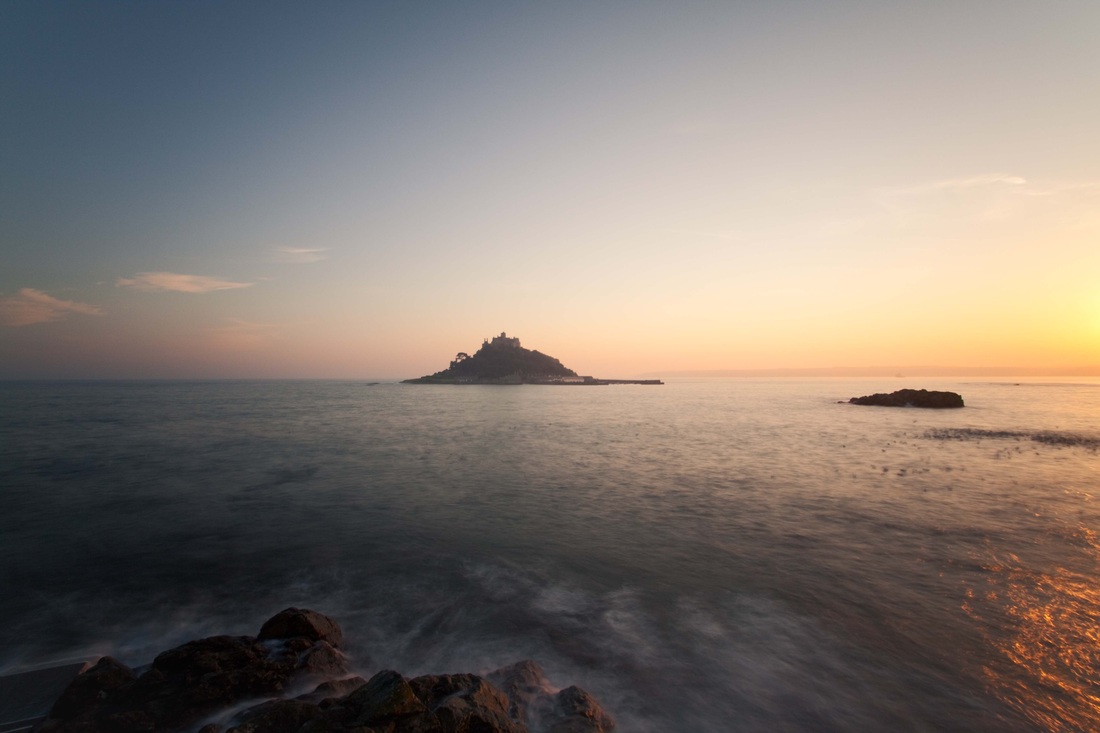
A holiday trip to Marazion, Cornwall is perfect to complete this exercise. I never get fed up of trying to capture the perfect image of St Michael's Mount and Mounts Bay, and have probably taken hundreds of images of this area during my frequent trips there.
Workflow plan.
Pack the following :
Camera
10-24mm lens. 28-75 lens. 70-200 lens. 50mm prime.
ND 9 stop filter & circular polariser filter
Tripod
Battery charger & spare batteries
Cable release
Memory cards all empty & formatted.
Laptop & external hard-drive.
Shooting :
Mount's Bay & St Michaels Mount at varying times of the day & hopefully different weather conditions. Get tide times.
I want to try my new 9 stop filter, this will be a challenge.
Not just landscapes planned, I also want to include people in my shots.
Delete as I go along if I am sure the image is unusable, time allowing-- I do not want to keep checking each image.
Check histogram & bracket shots if I feel necessary
Camera set to manual as usual, ISO as needed etc.
Post shoot each day:
At end of each session upload all images onto my laptop into a new folder and also copy Raw files to an external drive. (I will need to revise this method once I use my iMac and I need to consider how I will manage my images on location. I will probably have to buy another laptop or look into some form of compatible portable storage ) Good job it's Xmas soon!
Tag each session and perhaps review briefly, deleting any obvious mistakes, bad exposures etc.
Will leave majority of processing, printing, and uploading to Web till I get home.
My 7 day session.
I found it easier to decide on each day exactly what, how, and when , I was going to shoot. I was dependant on the weather and tide times , something totally out of my control. I loaded each session onto my laptop and deleted any obviously unusable images. I backed up to an external hard-drive every evening applied basic tags but left any other processing until I got home. All session images taken with a 10-24mm lens, tripod, cable release and ND 9 stop filter. A word about this filter, to expose properly you first compose and expose for the scene without the filter fitted, attach it , then increase exposure by about 27 stops, I found I needed to bracket all my shots. Additionally once fitted it is impossible to re-compose without taking it off again. This was time consuming and fiddly, not something I allowed for. An easier solution would have been to just go out later or earlier in the day when the light levels dropped but sometimes that is not practical and I made the decision to use the filter for this session as I was on holiday with my husband and we would be going out later ( when the light would be perfect ! ) to eat. Because I was staying just across the road from the causeway access was easy, making my planning much easier. I knew exactly what I hoped to capture and therefore did not waste time scouting around for a suitable location , I just needed to wait for favourable conditions. What I did find was once home was that I had a large number of very similar images and choosing the best was very time consuming and it was practically impossible to choose between some. A discerning eye is essential , but as I noted for my first workflow exercise how any image is viewed will usually be from a subjective point of view. As the creator of each image I find it extremely difficult to pick out just one and even harder to delete images that are perfectly acceptable but just too similar to others. This is what I really need to get to grips with in order to create a more streamlined , efficient, and less time consuming workflow .I am still processing my holiday "snaps" and do wonder if I should get into the habit of shooting in Raw & Jpeg mode. This would enable me to have an instant record of my trip/ or session and then enable me to concentrate on only fully processing , what I consider , are the very best images .
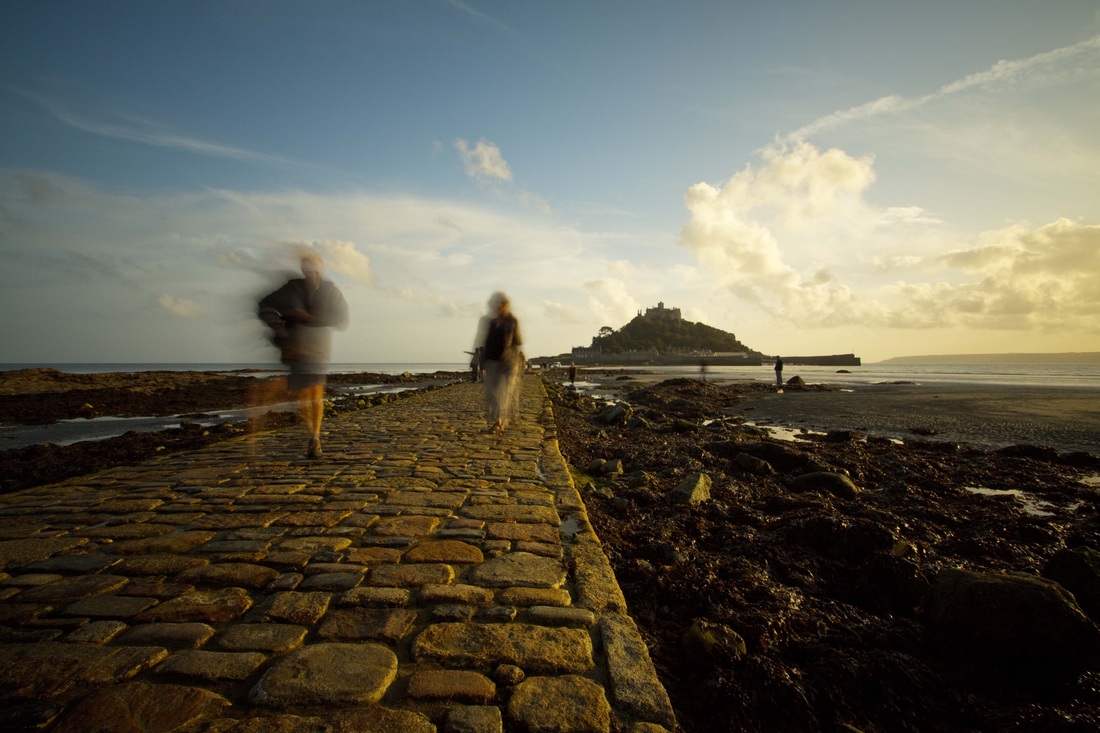
For my final chosen images shown below I kept post processing minimal , but to add variety I altered the WB , created some black and white images , some colour , and one sepia image.
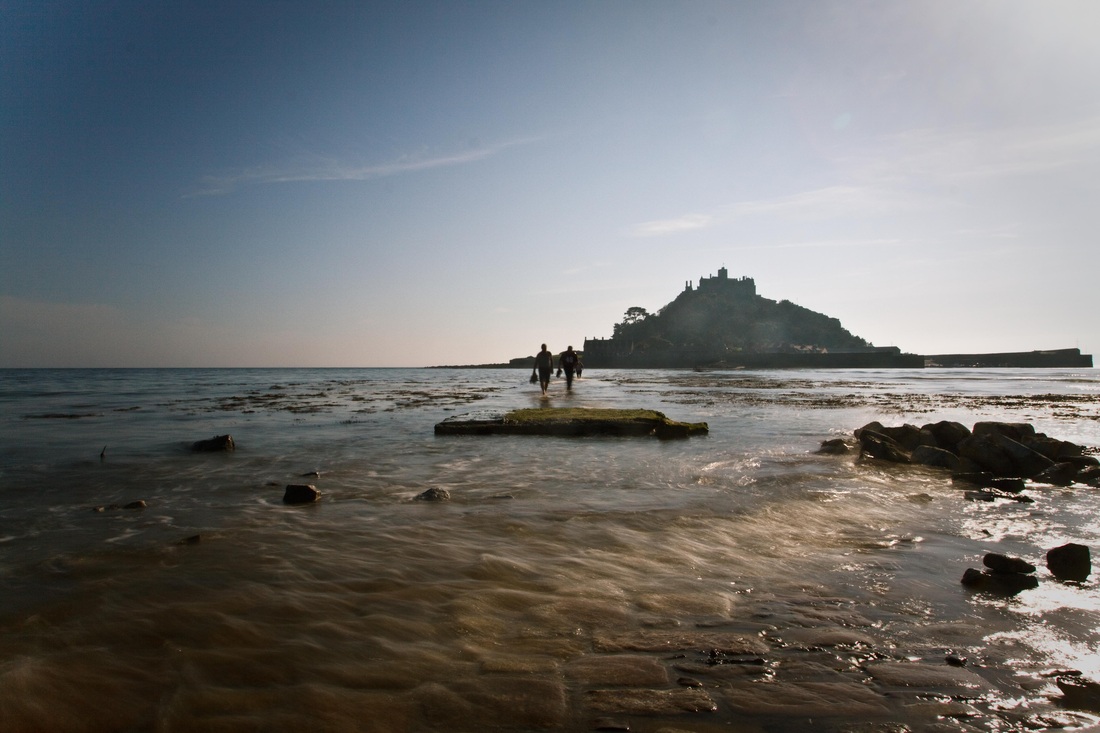
 Session 1: First 24 images. Low sun evening time. This was the first time I had used my new filter and my plan was to be able to go out earlier in the evening but still be able to use a very slow shutter speed. My aim for this session was to capture perhaps just one or two people crossing the causeway at a quieter time of the evening when there are less visitors. I wanted to capture an ethereal moment, many people find this place magical and mysterious. Using the filter was more difficult than I anticipated, some images were deleted immediately --totally underexposed. However it is fun to use and I included myself in one long exposure shot. I got into conversation with a Dutch tourist who was most interested in what I was doing as we talked it got darker so that session was over.
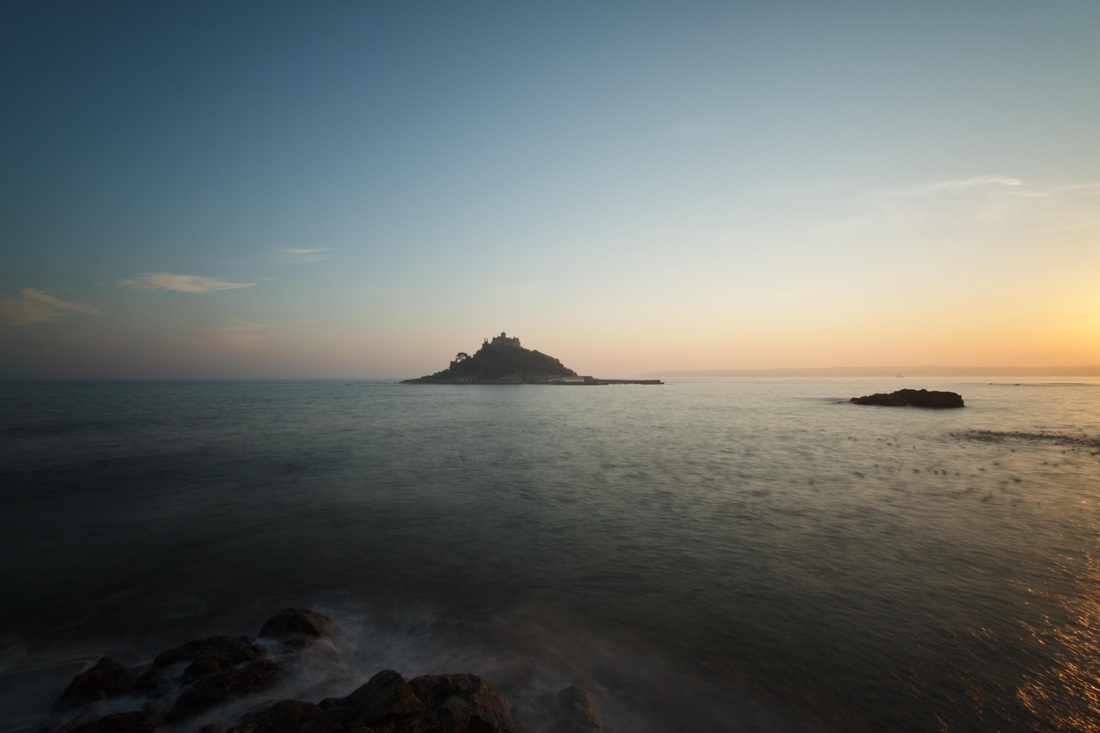
 F8 10mm ISO 100 1 sec exposure Custom WB 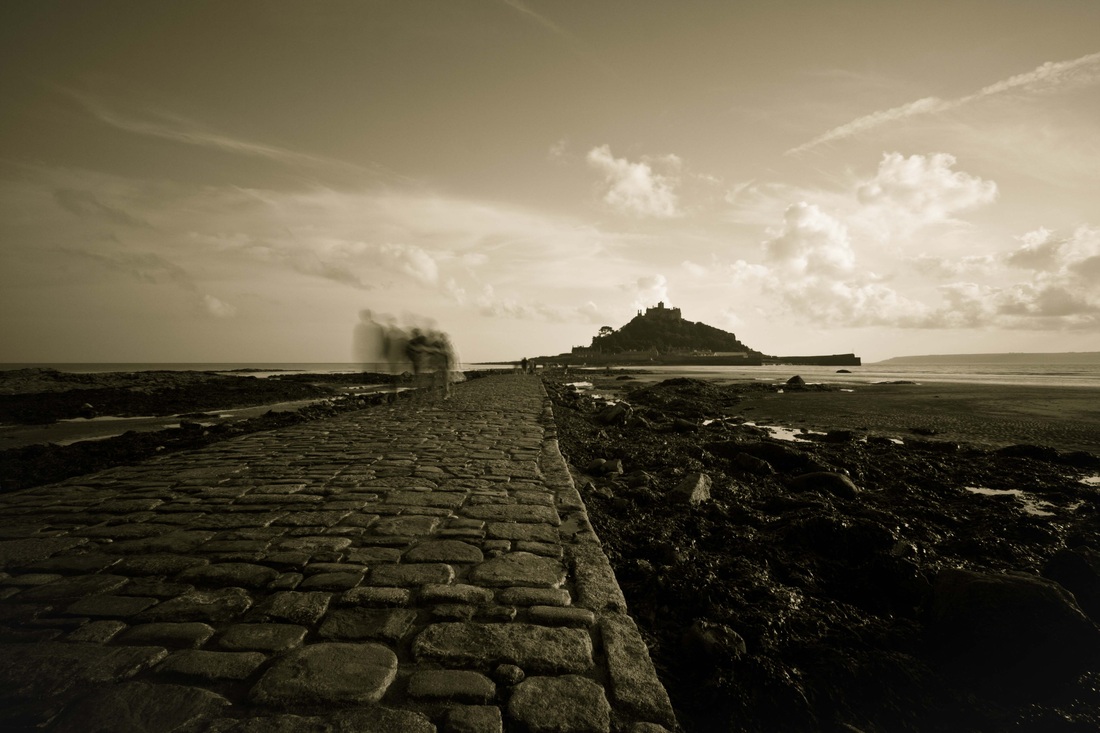 F11 10mm ISO 100 1.6 sec exposure Shade WB Sepia tone 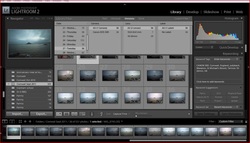 Session 2: 19 more images taken a few days later of Mount's Bay overlooking St Michaels Mount.
Late afternoon . Bracketed shots ranging from 0.6 to an 8 second exposure.
 F18 10mm ISO 100 Custom WB @ 7595 8.0 Second exposure  Session 3: Two days later another 49 images taken. Bright clear sky, no cloud cover, late afternoon. Again using the filter I took multiple exposures, briefly checking the initial few were not underexposed, but to save time and battery life I then took bracketed shots to compare later on the computer screen. Additionally it was the highest tide of the year and I hoped to take advantage of this and placed my tripod low down but on reviewing these on the computer screen did not feel any of the images were particularly thrilling compositionally . In order to obtain the smooth appearance that I wanted I needed a slow shutter speed. Even with my 9 stop filter on I needed to wait for the light to be low enough to do this. All the images were taken from exactly the same spot so all were very similar. Light and how best to utilise it to advantage is a fundamental photographic skill, a skill I really hope to improve on as the course progresses.
Final mammoth session split into two parts of the same day I took a total of 111 images. A gorgeous day with blue sky and sun--unusual for the UK !!!
The first part of my day, mid afternoon, I attempted to place my tripod on the causeway as the
tide (and tourists) came in towards me--not as easy as I thought. The causeway is very uneven and it takes some time to adjust a tripod to ensure it is level. The tide came in quicker than I expected , my feet and trousers got soaked ,plus I had to keep moving backwards and recomposing. Hence I ended up with quite a few slanted images! I would have also preferred to have taken this kind of shot later in the day when the sun was lower, but was dependant on tide times to capture what I was aiming for.
Second part of this session was later towards the evening when the sun was beginning to set , the light was lovely.
After reading through this section I realise I thought of a digital workflow as the process that starts once images are loaded onto a computer and imported into Lightroom/Photoshop etc to sort and manage. I also back up my LR catalogue weekly. I have a system prior to this stage but never really considered it as part of the whole process, which if I think logically it obviously is. Logging it down below makes me realise just how important this forethought and planning is as a component of my digital workflow.
My current workflow.
Equipment needed checklist. Camera (obviously) & lens.Biggest decision, depending on what I intend to shoot, is which lens to attach , and also how many others to take along with me. Unless I have an “assistant“ (AKA as hubby) my bag can get very heavy and if at all possible I prefer to travel light. Also changing a lens outdoors can be a problem, but not so much for a portraiture session indoors. I always make sure my 2 battery packs are charged, I have a battery grip attached to my camera and this usually has enough power to last for several days. I also take along 6 spare AA batteries which fit the grip just in case — a belt and braces approach! Empty memory cards x at least 3 . Again depending on my subject matter I consider if I will need my tripod. Its heavy but very stable—– essential for certain shooting situations——I have a love/hate relationship with it! I do not like using a tripod but it is impossible not to use sometimes. Cable release if using my tripod. Will I need a filter? All my lenses have a UV filter on. In addition I have a 9 stop ND filter and a circular polariser .Fingerless gloves——an essential in cold weather and kept in my camera bag all year round–the British weather in so unpredictable !!!
Camera settings & Shooting . I shoot Raw and have my camera set to record the largest file size which is about 15 megapixels . If at all possible I try to use ISO 100 or ISO 200 but increase if needed. As I use Raw I leave the WB on auto and correct the WB in Lightroom. I prefer to use manual camera settings but very occasionally will use AV or TV priority. The highlight clipping warning is always on. I use SRGB colour space. I have the automatic image review turned off but I do check the histogram of individual images– if time allows during the shoot– and will take a series of bracketed shots if I feel this is necessary, but this is not always possible. Shooting Raw has the advantage that exposure can be corrected later but if possible I like to achieve this in-camera. If any “horrors” are very obvious I will delete them at this stage from the memory card. Metering and motor drive depend on the circumstances during the shoot.
Post shoot. Create a folder on my computer and upload all the Raw images on my memory card onto my computer with a file name straight into Lightroom which catalogues them. I also back up the images to a separate hard drive at the same time. I now add keywords and tags, more may be added later as I process the images. Review the images and delete any that are unusable. I take my time during this process , any that are technically bad go immediately. I then scrutinise again to check facial expressions, compositions etc and delete any I feel are not suitable.( I could return to these if needed as they have already been backed up to another hard drive.) Process the images. Depending on what they are going to be used for will influence how much time I spend on each individual image. General family occasions and holiday “snaps” get quickly done and are exported as jpegs, a few are uploaded to Flickr to share via the internet, all are uploaded to Photobox and prints ordered. All jpeg images are then also saved on my external hard drive. College work and any images I want to print myself A4 or A3 size on my Epson printer will be exported to Photoshop as a 16 bit Tiff file touched up and saved as a Tiff file. These are printed and also backed up onto my external hard drive, additionally I will create a small jpeg file to upload to Flickr. Lighroom catalogue is backed up once a week.
Exercise 1: Your own workflow 1 (Flowchart as a list.)For this exercise I want a very simple set up and will shoot a short– maximum of 60 minutes–portrait session with my mum who will be 86 next week. Out of all my family she is my most enthusiastic model, the qualities I love are the ones she most hates!!! “airbrush my wrinkles — I am sure they are not that bad—it’s your camera that makes me look this old ” I think an older subject has character that can be lacking in what is considered conventional beauty, this is something I love to look for when photographing people. She is not as nimble as she used to be and therefore I have to allow for the limitations this will cause during the session. Sticking to a specific time limit will, I hope, actually help. One of the great things about digital photography is the ability to keep taking pictures but it also has the drawback that there never seems an appropriate moment of knowing when to stop.
Equipment:
Camera + 50mm F1.4 prime lens—my favourite portrait lens. Tripod. Cable release. Formatted empty memory card & fully charged batteries Black velvet backdrop + one other backdrop if time allows.
Camera settings: Manual settings will adjust as needed. Raw . ISO 250 .One shot auto focus drive mode, auto WB . Will decide on meter during the shoot. Highlight clipping warning on. SRGB.
Lighting conditions: I want soft but bright diffused light (sun with cloud cover )therefore will need to wait for the right weather conditions. I adore Jane Bown's black and white portraiture work--she only uses available light , never artificial.
Location & shoot: Will be at my home , a 45-60 minute session , using available daylight outdoors & a simple background . I aim to take close up, head & shoulders , torso , & full length compositions.
Post shoot: As described in my current workflow above BUT I will need to streamline this process as the brief of the exercise is to edit down to just one or two final selected images to fully process.
Assessment: Shoot. I took perhaps 50 images in the time limit I set myself. I did not plan to review the images during the shoot (except to check quickly for highlight clipping) but found I needed to as I knew I had released the shutter a couple of times when my mum had shut her eyes! These were deleted immediately leaving 43. The time limit helped me concentrate more on the task in hand, without this limit I might just have continued taking more and more, but not necessarily better. On reflection though I perhaps need to slow down more , take more time between shots ,carefully observing my subject, take even less shots. I was after specific poses and facial expressions and gave my mum specific instructions during the shoot. These did not always go to plan and I had to take several shots in quick succession to ensure I got the expression I wanted. A major problem was her lack of mobility, she is quite unsteady sometimes on her feet and if I asked her to lean back or turn away she became disorientated–I did not fancy a trip to the local A&E department ! So on a practical level some of my ideas were unworkable, using a fixed focal length lens meant I had to physically move the tripod to recompose as she was unable to move back and forth, this was quite a nuisance and something I had not considered. I took a couple of very close up images by taking the camera off the tripod. When using a plain black background spot metering will help prevent the main subject being overexposed ,but I had failed to change my camera setting from partial to spot, therefore my subject was overexposed in the first couple of images, which again were deleted straight away when I checked for highlight clipping. I really should have set this BEFORE I started the shoot and is something I really must get into the habit of doing before setting out. During the shoot, as I was having difficulty obtaining a range of compositions ,I took some unplanned photographs of her hands, which hopefully add variety. The stupidest thing I did , and I still can’t believe I actually did it , I forgot to attach my cable release to the camera and found it in my camera bag at the end of the shoot !!! I find a cable release invaluable , once I have composed through the viewfinder I can then stand up and direct or just simply observe my subject closely as I shoot. It was on my list, I have no idea why I forgot to use it, it was in my bag along with my chosen lens in the kitchen, all my other equipment was left upstairs. Whether it has made any difference to the final outcome I will never know , but I will make sure I do not forget it again.
Assessment :Post shoot and processing.43 images imported into LR library which is set to also copy onto an external hard drive. I have created a new folder on my computer especially for the coursework and have put the images into a subfolder , Project 1. Usually at this point I would be happy to delete the images from my memory card . I want to improve my workflow and really streamline how I work, this exercise is perfect for trying to put it into practice. A major drawback to digital photography is simply the vast amount of similar images it is possible to take in a short space of time. Editing carefully and adopting a new system will, I hope, help me do this.
Reviewed the images in LR browser and marked as rejected any that were obviously unsuitable, a total of 23 . I was surprised at the amount I felt were unsuitable but the exercise is designed to test "creative judgement" pg 12 Photography I: Digital Photography Practice,Open college of the Arts.
With 20 images left, of which some were very similar, my criteria now was to choose the best out of each near duplicate . This was more difficult as each had its merits, however I rejected a further 6. At this stage and left with 14 I looked very carefully at mum's facial expression and body language, these are so important in portraiture. Finally, out of a total of 43 images, I whittled them down to just 7.
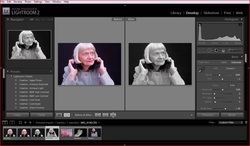
Of these 7 I finally processed 4 from which I would choose my final 2 when fully processed (I found it really hard to just limit my choice at this stage to 1or 2 images) . I created a virtual copy of each and converted all the images to black and white. Custom WB . Exposure was fine . Clarity was increased. Adjusted tone curve increasing lights and darkening darks----- I want my lights light & darks dark, with a strong contrast. LR camera calibration adjusted as I felt necessary, usually neutral but for my favourite final image I used the portrait setting. I increased the green and red saturation very slightly , and decreased the blue. I love mono images and enjoy tweaking the colour settings to see how it alters the depth of the tones and textures.
At this point my workflow becomes a bit chaotic. I use LR version 2 but have just bought a new iMac and will be moving from a PC to a Mac for the next part of the course so this will change. At the moment I edit the image as a 16 bit Tiff , I do not do too much processing here , mainly just levels adjustment, I save this without sharpening. I then open up the file again and convert to an eight bit file and save this version as a small size jpeg for web use. Finally I then open up the original 16 bit Tiff again , sharpen for print using the unsharp mask set at 160% 1.5 radius 20 threshold. and save as a new Tiff in a PS version set. Rather a cumbersome approach. I will be using LR 3 with my new Mac and this can send jpeg files from LR straight to Flickr so I hope I will be only creating 1 Tiff file in future. I am doubling my workflow at the moment !!!
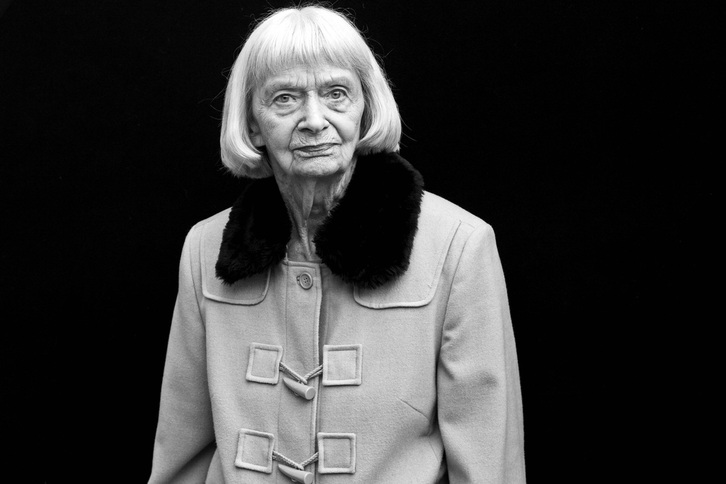
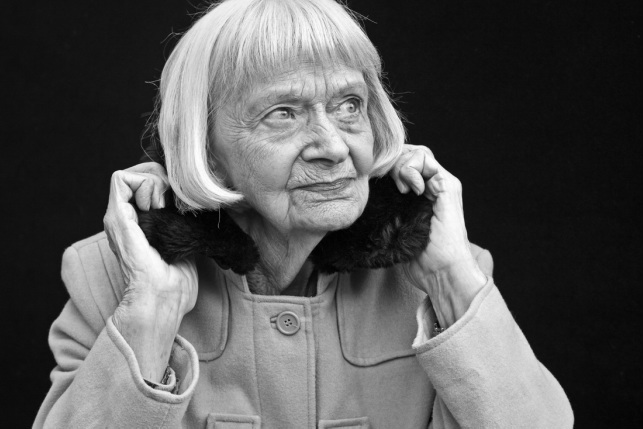
The images below were chosen because I felt both represented what I had aimed to capture. Mum, even at 86 ,is a strong independent character .I wanted these qualities , along with the obvious signs of age , to stand out. I do not aim to just capture happy "smiley" portraits. I want to create images that perhaps make you consider the person captured by the camera in a split second of time.For those few seconds what was going through my mum's mind ? I like the strong contrast of her pale skin , silver hair, and pale grey coat against the dark tones of the fur collar and black background. I like the minimalist quality using a plain black background creates, but not to everyones taste I realise.
Both images: F5.6 1/80 ISO 250 @ 50mm
I do like her expression here, the half smile.Hands---they cause such a problem in portraiture, I was unsure how to pose her for this torso shot but wanted it to look as if she was cuddling up into her coat. I really am torn which is my favourite , this has a more relaxed less contrived look than the first image.
What have I discovered about my own workflow? In future during a timed portraiture shoot I feel I really must slow down, not take too many frames, as I discovered over half of what I took for the exercise were unsuitable. Is this a bad thing? The technology is there, no film is being wasted, but crucially it is easy to be lazy and hope out of the many images taken one or two will be ok. Not that there is anything wrong with being able to take a wide selection to choose from but is it really necessary? I also found on being left with less than a handful of reasonable images the decision to choose just one became much more difficult. Art is subjective, this is what made selecting just one or two final images so difficult, whom am I choosing for, myself , the subject, someone else? As the photographer I alone capture the moment but how will be dictated by what the expected outcome of the session is. Therefore careful planning--location, props, lighting-- prior to shooting is really important to achieve the expected result, but flexibility is needed too if things do not go to plan. Post processing I am reasonably happy with my workflow but do want to progress and learn more and have purchased 2 of the recommended books for the coursework ( see book review section 3/11/2011) I plan to make it more streamlined when I start to use LR version 3. Flagging images as rejected during my first selection process was really useful and a new element in my workflow. I usually do not delete until I have finished processing the keeps. I have kept too many below average Raw files on my hard-drive for too long!
|
 RSS Feed